[version_1.0]

Note

The exercises in this course will have an associated charge in your AWS account. In this exercise, you will create the following resources:

The final exercise includes instructions to delete all the resources that you create in the exercises.

Familiarize yourself with Amazon S3 pricing, AWS Systems Manager pricing, AWS Cloud9 pricing, and the AWS Free Tier.

Exercise 1: Setting Up and Exploring the SDK

In this exercise, you install and configure the AWS Command Line Interface (AWS CLI) and the AWS SDK for JavaScript in Node.js. After you install the necessary requirements, you create an S3 bucket and deploy a web application to the bucket. You then set up data in Amazon S3, and configure AWS Systems Manager parameters for the Dragons application. After you create all the resources, you explore the JavaScript application.

If you choose to use a local IDE instead of an AWS Cloud9 instance, you can follow the optional steps on Local IDE Prerequisites.

You will want to run the steps in the US East (N. Virginia) us-east-1 Region.

Task 1: Creating an AWS Cloud9 environment

For this task, you will create an AWS Cloud9 environment, which you will use as your development environment throughout the exercises.

  1. In the AWS Management Console, choose Services, and then search for and open Cloud9.

  2. Choose Create environment.

  3. For Name, enter JS-DevEnv and choose Next step.

  4. In the Configure settings page, keep the default settings, and choose Next step.

  5. Choose Create environment. It might take a few minutes for the environment to be created.

  6. In the AWS Cloud9 (or local IDE terminal), install the SDK for JavaScript in Node.js:

Task 2: Creating an S3 bucket

In this task, you will create an S3 bucket. This bucket will store the web application frontend. AWS Command Line Interface (AWS CLI) commands are supplied for use in your AWS Cloud9 or local IDE terminal. To perform the same steps with the SDK, see the appendix.

  1. In the AWS Cloud9 or local IDE terminal, run the following commands. You will be prompted for a bucket name, then the following command creates the bucket. You need to use a unique bucket name. For example, you could combine your initials and -dragons-app to create a bucket name (such as hjs-dragons-app).

    First, save your bucket name to an environment variable:

    Create the bucket:

    If your bucket name isn’t unique, you will see an error message. Continue running command and entering a new bucket name until you have successfully created a bucket.

  2. After the bucket is created, make the environment variable available in future exercises by adding an entry to your .bashrc:

  3. List the buckets in your account. Confirm that the newly created bucket is in the response.

    For more information about the SDK syntax, see listBuckets in the AWS SDK for JavaScript documentation.

For more information about AWS CLI commands, see the AWS CLI Command Reference.

Task 3: Deploying a web application to the S3 bucket

In this task, you will deploy a simple web application to the S3 bucket. Amazon S3 will become the web server for your static website, which includes HTML, images, and client-side scripts. Instructions for copying the web application are supplied for both the AWS CLI and the SDK.

  1. In the AWS Cloud9 or local IDE terminal, download and extract the web application.

  2. Copy all the contents of the webapp1 folder to Amazon S3.

  3. To find the URL for the web application, run the following AWS CLI command.

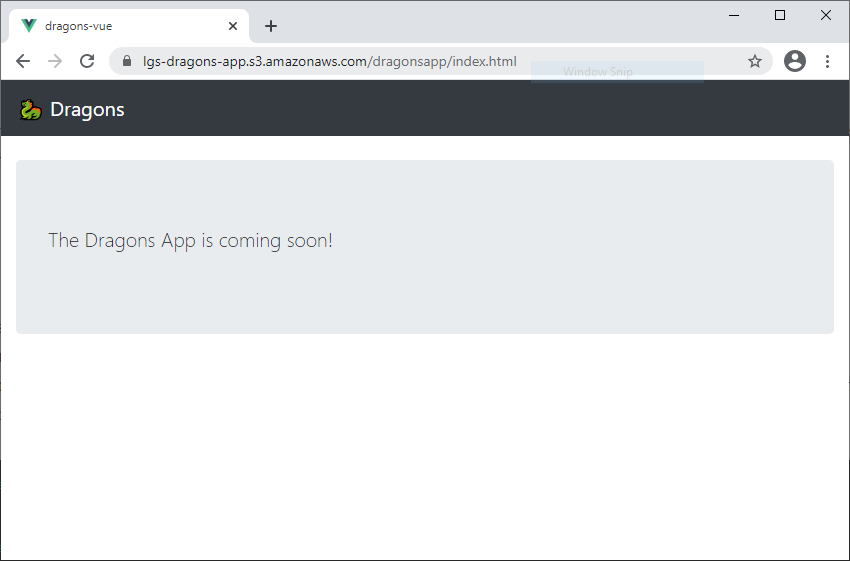
  4. Paste the URL output into a browser to visit the web application, which is hosted on Amazon S3.

  5. Confirm that your web application works. It will look similar to the following screen capture.

    Dragons application user interface
    Dragons application user interface
  6. In your browser, bookmark this application because you will return to it in future exercises.

Task 4: Setting up the Dragons application

In this task, you will create resources that the Dragons application will use. You will download the file that contains the dragons data in JavaScript Object Notation (JSON) format, and upload this data to your S3 bucket. Then, you will create two parameters for Systems Manager. The console application that you create after this section uses the dragons data for querying, and it uses the parameters for configuration.

  1. Download the source of the dragons data: dragon_stats_one.txt.

  2. Copy the dragons data in dragon_stats_one.txt to the root of the S3 bucket.

  3. Confirm that the data populated the S3 bucket. You should see the dragonsapp/ prefix and a dragon_stats_one.txt object, in addition to the other objects in the bucket.

  4. Set the Parameter Store value for dragon_data_bucket_name.

  5. Set the Parameter Store value for dragon_data_file_name.

Task 5: Exploring the console application

In this task, you will explore the console application.

  1. Download and extract the console application, which is a JavaScript file.

  2. Open the listDragons.js file to see how it uses the Systems Manager parameters to retrieve the bucket name and file name.

  3. You can run the file to get some dragon data from dragon_data_file_name.

    It should return some JSON output that’s similar to the following:

Appendix: How would you do this exercise with the SDK for JavaScript in Node?

In this exercise, you have followed these steps to create the infrastructure for a simple application:

The AWS CLI is suited to perform all these one-time tasks. As a quick experiment, consider: how would you do the same steps with the SDK?

The following example script performs the same steps by using the SDK.

const AWS = require('aws-sdk');
const fs = require('fs/promises');
const path = require('path');
const s3 = new AWS.S3({region: 'us-east-1'});
const ssm = new AWS.SSM({region: 'us-east-1'});

const extMime = {
  '.ico': 'image/x-icon',
  '.html': 'text/html',
  '.css': 'text/css',
  '.js': 'application/javascript',
};

async function createDragonsBucket() {
  const params = {
    Bucket: process.env.MYBUCKET,
  };
  const createResult = await s3.createBucket(params).promise();
  console.log(createResult);
}

async function listAllBuckets() {
  const listResult = await s3.listBuckets({}).promise();
  listResult.Buckets.forEach((bucket) => console.log(bucket.Name));
}

async function* walk(dir) {
  for await (const d of await fs.opendir(dir)) {
    const entry = path.join(dir, d.name);
    if (d.isDirectory()) yield* await walk(entry);
    else if (d.isFile()) yield entry;
  }
}

async function uploadDragonsApp() {
  const webapp = path.join(process.env.HOME, 'webapp1');
  for await (const fullpath of walk(webapp)) {
    const relpath = path.relative(webapp, fullpath);
    const mimetype = extMime[path.extname(relpath)];
    const data = await fs.readFile(fullpath);
    const base64data = Buffer.from(data);
    const params = {
      ACL: 'public-read',
      Body: base64data,
      Bucket: process.env.MYBUCKET,
      Key: 'dragonsapp/' + relpath,
      ContentType: mimetype,
    };
    await s3.putObject(params).promise();
    console.log('uploaded ', relpath);
  }
}

async function uploadDragonsData() {
  const data = await fs.readFile('dragon_stats_one.txt');
  const base64data = Buffer.from(data);
  const params = {
    Body: base64data,
    Bucket: process.env.MYBUCKET,
    Key: 'dragon_stats_one.txt',
  };
  await s3.putObject(params).promise();
  console.log('uploaded dragon_stats_one');
}

async function putDragonParameters() {
  const p1 = await ssm.putParameter({
    Name: 'dragon_data_bucket',
    Value: process.env.MYBUCKET,
    Overwrite: true,
    Type: 'String',
  }).promise();
  console.log(p1);
  const p2 = await ssm.putParameter({
    Name: 'dragon_data_file_name',
    Value: 'dragon_stats_one.txt',
    Overwrite: true,
    Type: 'String',
  }).promise();
  console.log(p2);
}

function printMenu() {
  console.log('1. Create the dragons bucket');
  console.log('2. List all buckets');
  console.log('3. Upload dragons app');
  console.log('4. Upload dragons data');
  console.log('5. Set parameter store parameters');
  console.log('6. Exit');
}

function menuLoop() {
  const readline = require('readline');
  const rl = readline.createInterface(process.stdin, process.stdout);

  rl.setPrompt('Enter your choice [1-5]:  ');
  printMenu();
  rl.prompt();
  rl.on('line', async (line) => {
    let quitting = false;
    switch (line) {
      case '1':
        await createDragonsBucket();
        break;
      case '2':
        await listAllBuckets();
        break;
      case '3':
        await uploadDragonsApp();
        console.log(`URL: https://${process.env.MYBUCKET}.s3.amazonaws.com/dragonsapp/index.html`);
        break;
      case '4':
        await uploadDragonsData();
        break;
      case '5':
        await putDragonParameters();
        break;
      case '6':
        quitting = true;
        rl.close();
        break;
    }

    if (!quitting) {
      printMenu();
      rl.prompt();
    }
  });
}

if (!process.env.MYBUCKET) {
  console.log('Please set MYBUCKET environment variable');
  process.exit(1);
}

menuLoop();